You will need to print out the QR codes (or optionally use a mobile device) for your photo session. It is designed to be printed out on a standard size paper (8.5" x 11" in the USA).
These QR codes can also be scanned by the customer to take them directly to their photos. So once you have photographed the subject you can give them the printed out QR code to take home to scan later.
Once you have created the job / gallery, click the QR Passcodes tab. You will have the option to "Print QR Codes Without Subject Data" or if you have imported entries, "Print QR Codes With Subject Data".
1) You do have subject data
Once you have created the job / gallery in Sytist, go to the QR Passcode tab and click the "Print QR Codes With Subject Data" option. You can still give the subject the QR code print out which they can scan to access their photos. But if you have contact data (email) you can also email the customers the passcodes when the photos are ready.
2) You don't have and won't have subject data like name, contact information, etc...
Once you have created the job / gallery in Sytist, go to the QR Passcode tab and click the "Print QR Codes Without Subject Data" option.
It is important that the subject takes home the paper with the QR code printed on it because it is the only information they will have to access the photos.
Example
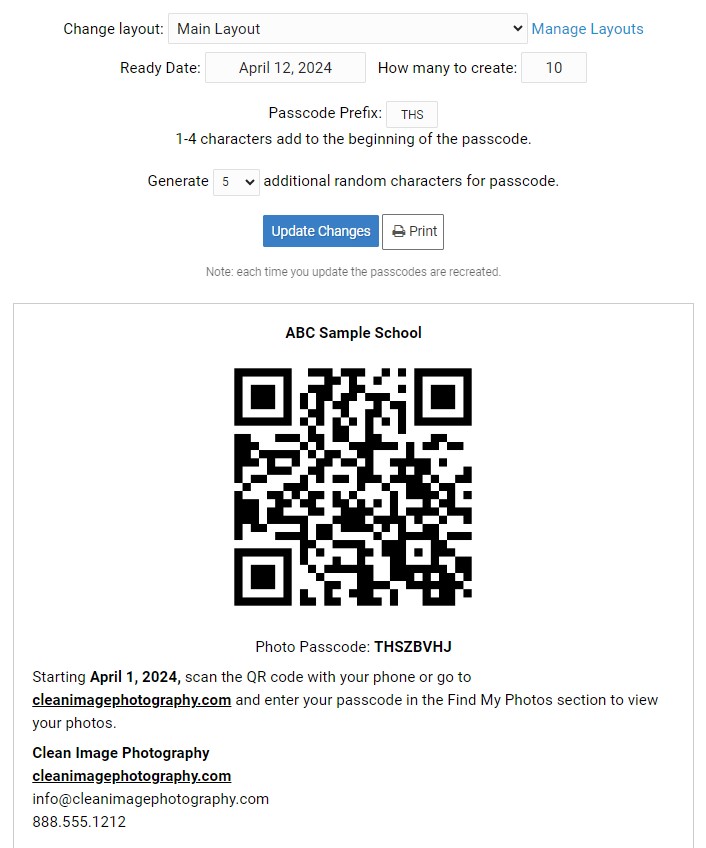
Here is a screenshot of the print screen "Print QR Codes Without Subject Data" since it has a few more options. When you have subject data, data like subject name will be added to the print out automatically.

The options you have here:
Change Layout
Select from layouts created in Settings - QR Passcodes
Ready Date
The date the photos should be available on your site to view.
How Many To Create
How many QR codes to generate and print out.
Passcode Prefix
1-3 characters to add to the beginning of the passcode. Possibly the initials of the school you are shooting.
How Many Characters To Create
How many more random characters to use to create the passcodes.
Printing QR Codes with the subjects photos on the print out
New with Sytist 5.2 is the ability to print out the photos taken of the subject on the QR sheet.
In the QR Passcodes tab of the gallery, if there are photos uploaded to the gallery and subject data, you will have a button to Print QR Codes With Photos.
You have options in the Print Layouts "Print Out With Photos" layout for the maximum photos to display, maximum height and photo file to print out.