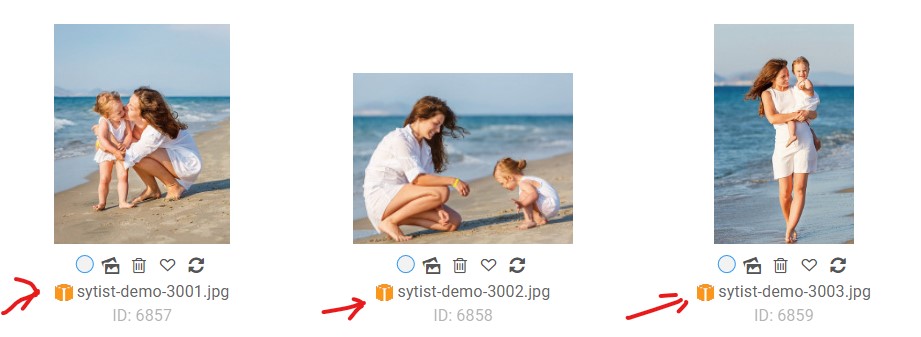
Hosting photos on Amazon S3 is inexpensive and delivers the photos quickly. (This option not available with Sytist Hosted, only when hosting Sytist yourself.)
After you have created your S3 account and bucket you will enter in that information in your Sytist admin in Settings -> Photo Settings.
Notes:
- a) As of Sytist version 3.8.0 you can use signature versions 2 or 4.
- b) As of Sytist version 3.8.0 you can change buckets in your Sytist settings and it won't break the existing photos (they will remain in the bucket they were uploaded to).
Create an Amazon S3 account
If you do not already have one you can create an account here. Once you have an account you can access the S3 part of AWS under storage or click here.
Get Your Credentials
Click on your name in the upper right of the AWS console and click "My Security Credentials".
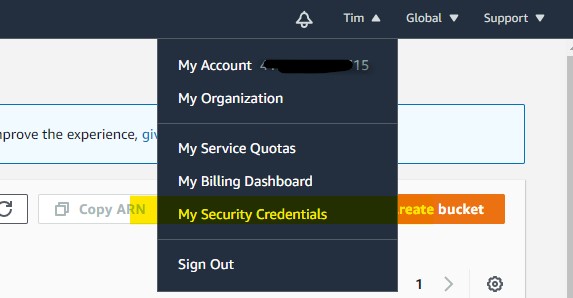
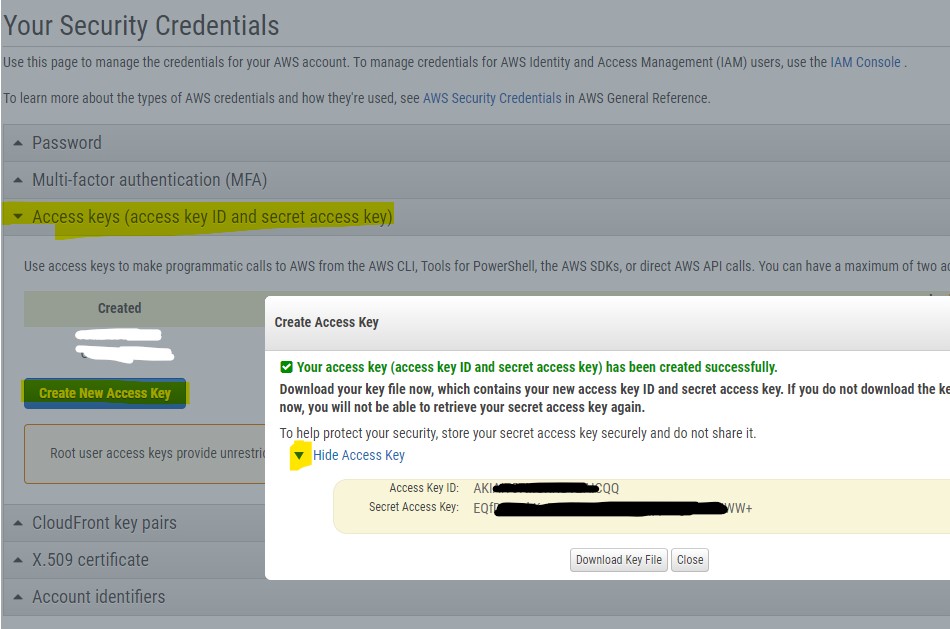
Next click the Access Keys (access key ID and secret access key) section.
Click the Create New Access Key button. You will then have an Access Key Id and Secret Access Key which you will need to enter into your settings in Sytist. For now copy and paste them somewhere to save because you will be entering in those into your settings after you have created a bucket. You can also download that key file to save to your computer.
Creating a Bucket
A bucket is where all the photo files will be moved to. Basically a folder on the Amazon S3 servers.
To get to S3 from the last page click Services in the upper left corner and under Storage click S3 (or just click here).
Click the orange Create Bucket button.
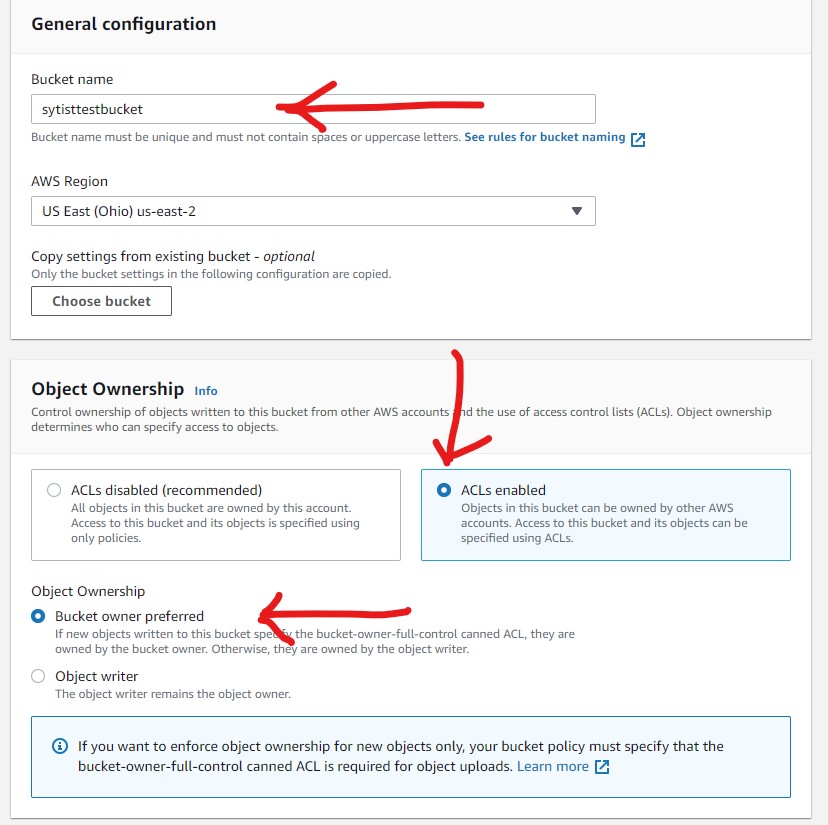
Give the bucket a name and under Region select a region that is closest to you.
Change the Object Ownership to ACLs enabled.
Under "Bucket settings for Block Public Access" UNCHECK the Block all public access option. The bucket needs to be public so the photos can be displayed on the site.
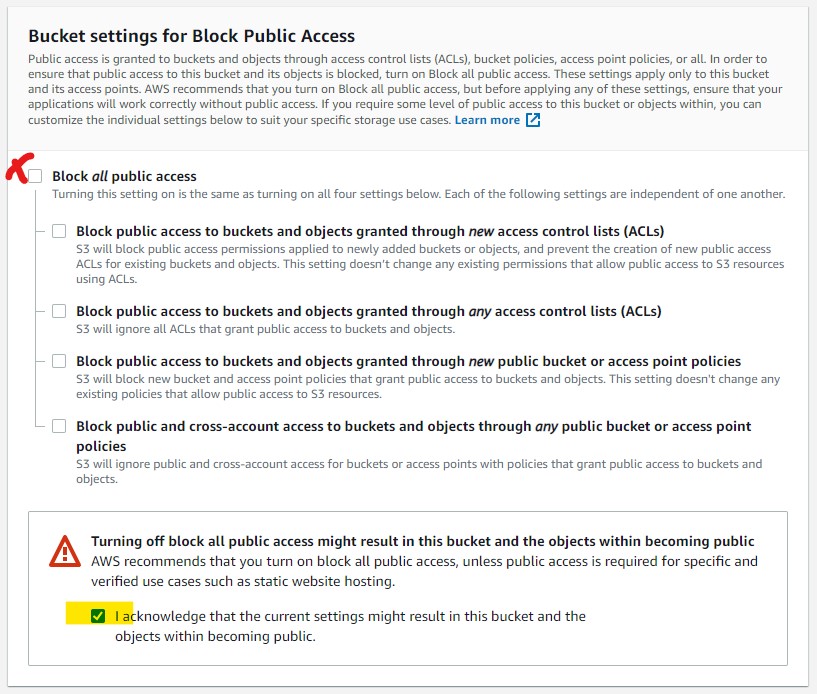
All of the rest of the settings can stay the same so just scroll down to the bottom and click Create Bucket.
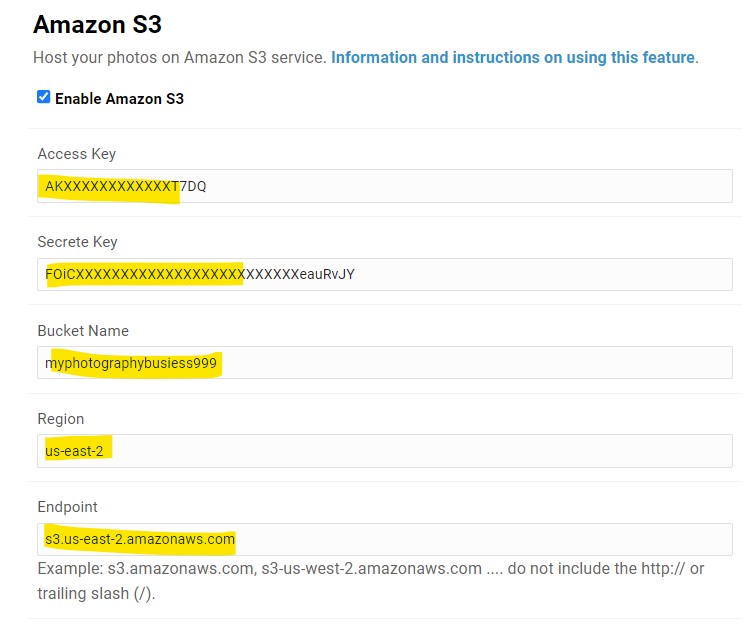
After it is created you will see your bucket listed and next to it it will show the Region which you will need to enter into your settings in Sytist.

One last piece of information you will need is the Endpoint. Go to this page & find the region from above to get your endpoint.
Now in your Sytist admin go to Settings -> Photo Settings. You will enter in all the information you gathered under the Amazon S3 section and be sure to check the Enable Amazon S3 option.
Test It
Before uploading a bunch of photos, create a test gallery and upload 1 photo with Amazon S3 selected to test and make sure the photo displays. If it doesn't display or show it being hosted on S3 (orange S3 icon under the thumbnail) then something is not set up correctly.
Moving Photos to Amazon S3
1) In the upload photos dialog window, there is a option to move the photos to Amazon S3 after they upload. This will slow down the upload process slightly because once a photo is process (watermarked, resized, etc...) it then moves the photo over to S3 then deletes the created photo files from your server.
2) When viewing photos in the Photos tab of a page in the admin, there is a Move to Amazon S3 button. That will open a window where you can move existing photos to S3. This will move the existing photos to S3 and delete those files from your server.
There is also an option to move photos to S3 in the tray when selecting photos with the check-boxes.
When photos are hosting on Amazon S3 it will show the S3 icon under the thumbnails in the admin.
